Time for another English dessert! Banoffee pie. According to the internet, the inspiration for banoffee pie came from an American dessert, but the pie as we know it today was created in Sussex. Apparently when the US heard wind of this incredible pie, we began serving it in our restaurants and selling it in grocery stores, and we said it was an American pie. Hah! Silly, America. We lost that argument, but I can absolutely see why we'd want to take credit for this pie. It's delicious. If banana pudding was made into a pie and doused in caramel, I imagine it would taste something like banoffee pie. (banoffee=banana + toffee)

The recipe I used has a few ingredients that aren't so easy to find in American grocery stores. As I've mentioned, I'm still upset about our lack of "double cream" over here in the US, but heavy whipping cream will work instead. You can tell in the top picture how the double cream produces an almost meringue-like sheen. Amazing. If anyone knows where I can find this in the US please let me know.

Digestives are available at some US grocery stores, but if you can't find them, plain graham crackers will do. Digestives taste to me like a less flavorful mix between Biscoff cookies and graham crackers. I realize that doesn't sound appetizing, but I enjoy them. The use of store-bought dulce de leche instead of homemade will save you time and trouble. I have no idea why it is necessary to add more butter and brown sugar to the dulce de leche (aka caramel) in this recipe, but I don't ask questions when I know the results will be incredibly delicious. Is this pie good for you? No. Is it incredible and simple? Yes. Cheers to you and your delicious Banoffee Pie, Britain!

Banoffee Pie
Recipe from The Guardian (adapted slightly for substitutions)
 
Base
225g (8oz) digestive biscuits
100g (3.5oz) pecans
125g (1 stick/8 tbs) salted butter, melted

Filling
125g (1 stick/8 tbs) salted butter, diced
100g soft brown sugar
400g dulce de leche or caramel
½ tsp salt

Topping
60g (2 oz) pecans*
15g (3tbs) icing sugar or confectioners sugar
4-5 ripe bananas
Squeeze of lemon juice
275ml (1 1/4 cups)  double cream or heavy whipping cream
¼ tsp coffee granules

*Note: I skipped the addition of candied pecans on top for lack of time, but I recommend adding them if you have a few minutes to spare. I think they'd make this recipe even more delicious.

Pulse the biscuits to crumbs in a food processor until finely crumbled. Stir together biscuit crumbs, roughly chopped pecans and melted butter until completely blended. Press the mixture into a 23cm (10-inch) loose-bottomed tart tin/springform pan to line the base and sides. Chill while you make the filling.

Melt the butter and sugar together in a pan, and stir to dissolve the sugar. Add the dulce de leche and the salt and bring to the boil, stirring constantly until smooth. Pour over the base, and chill for an hour.

Preheat the oven to 180C (350F), line a baking tray and rinse and drain the pecans. Put into a bowl and sprinkle with the icing sugar, then spread out on to the baking sheet and bake for 15 minutes, shaking occasionally. Allow to cool. (The pie can be made up to this point up to 48 hours in advance.)
Thinly slice the bananas and toss with the lemon juice. Arrange on top of the cooled caramel in concentric circles.

Whip the cream and the coffee granules into soft peaks and spread on top of the bananas. Arrange the candied pecans on top and serve.


Every time I want to make an easy dessert for a fancy dinner I immediately think of some sort of meringue pavlova or trifle. I get excited because in my mind, it takes almost zero hands-on time to make meringues and throw some fruit on. But then every time, without fail, I realize I don’t have time to let the meringues dry out.

In the south where the humidity in the kitchen is often almost as bad as it is outside, I almost never attempt to make them outside of Winter. I usually buy them from the store. They’re still beautiful and impressive looking, and you don’t have to reserve your oven for hours on end.

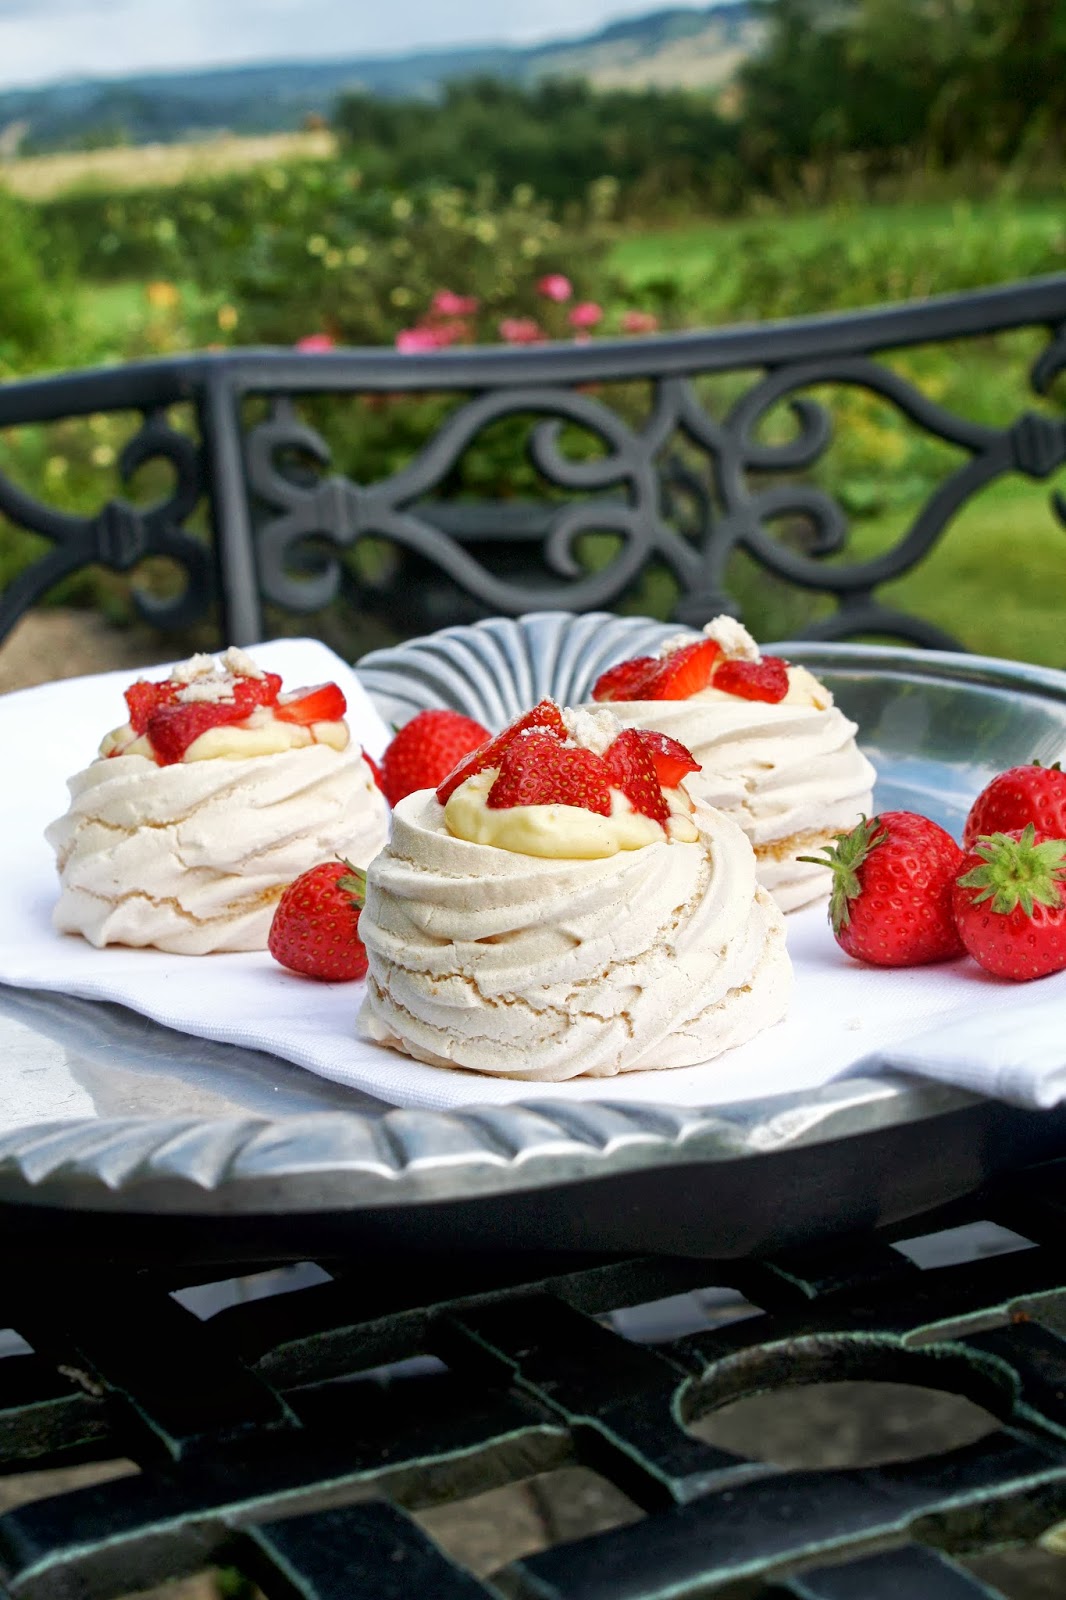
Individual trifles or anything with meringues will fancy up any dessert tray. I made these while I was in England because they sell custard in the grocery stores. It’s probably a good thing US stores don’t sell pre-made custard because I honestly would eat it on everything. It’s deliciously rich on its own, and mixed with the cream cheese it gets a smooth cream cheese flavor as well. If you live in England and can buy pre-made custard, this recipe is a breeze. Not to fear for those everywhere else though, you can make homemade custard which is also delicious. If you're really pressed for time, you can sacrifice a bit of the flavor (though it will still be great) and make it with instant vanilla pudding.

The original recipe calls for raspberries and Cointreau. A true trifle is made with Cointreau, but if you want to leave it out that’s fine. You can also sub in sliced strawberries for the raspberries. I prefer raspberries, but the pictures show the strawberry ones I made. As for whether to use meringue nests, like I've shown in the pictures, or glasses with a more traditional trifle look, that's up to you. Individual glasses allows you to add more custard and it's likely the cheaper option. I think Nests are just as pretty and are easier to serve if you're short on glasses. I doubled the recipe both times I made these because I was feeding a crowd. I used glasses once and nests once.

At the end of the day, this is really me suggesting that you all give trifle-making a try when you want to impress people. I’ve had them with custard, ice cream, cool whip, homemade whipped cream, etc. The layering piece is up to you, but I strongly suggest this custard because it is heavenly!

Enjoy!

Strawberry or Raspberry Meringue Trifle
Recipe slightly adapted from Taste AU

Ingredients
  • 1 3/4 cups-2 cups Raspberries (2 x 125g punnets raspberries)
  • 2 tbs Cointreau liqueur (optional)
  • 55g (1/4 cup) caster sugar
  • 8-ounces cream cheese (250g)at room temperature
  • 1 cup (250ml) bought vanilla custard* 
  • Meringues, coarsely crushed
* If you live in places, like the US, that do not sell custard in grocery stores, you can do one of two things. The ideal thing is to make homemade custard. I've included a recipe below. If you're not up for this, follow the direction on a box of Instant Vanilla pudding. Once pudding is ready and chilled, proceed to the cream cheese step.

Directions:
  1. Combine the raspberries, Cointreau and 1 tablespoon of the sugar in a bowl. Set aside for 30 minutes to macerate.
  2. Step 2
    Meanwhile, use an electric beater to beat the cream cheese, custard and remaining sugar in a bowl until smooth.
  3. Step 3
    Divide three-quarters of the raspberry mixture among six 250ml (1-cup) capacity serving glasses. Top with the cream cheese mixture and meringue. Top with the remaining raspberry mixture. 
    If you are making meringue nests instead of trifles, fill each nest with a teaspoon of raspberry mixture (depending on the size of the nest). Next, add 2+ teaspoons custard mixture, making sure the custard incorporates into the raspberries. Think of it like making sure the ice cream gets to the bottom of an ice cream cone. Top each nest with another teaspoon or two of berries. Sprinkle crushed meringues on top for decoration.

Jamie Oliver's Proper English Custard
Recipe from Jamie Oliver (on My Kitchen from Scratch)

Ingredients (yields about 8 cups/2 L)
  • 2 cups (500 ml) whole milk
  • 2 cups (500 ml) heavy cream
  • 6 tbsp granulated sugar
  • 1 vanilla bean, scored lengthways
  • 8 large egg yolks
Method:
  1. Mix cream, milk, and four tablespoons of sugar in a pot under medium low heat.
  2. Scrap out all the seeds in the vanilla bean into the pot. Put the beans in the pot as well. Keep stirring with a wooden spoon until it boils and then turn off the heat. Let it sit for a few minutes to let the vanilla infuse with the cream and milk mixture.
  3. In a separate bowl, whisk the yolks with 2 tablespoons of sugar until pale yellow in colour.
  4. Remove the beans from the pot and slowly add one ladle of the cream mixture to the yolks while whisking them together. Keep whisking and slowly add a couple more ladles. This process is called tempering and this will ensure that the eggs won’t curdle when they come in contact with hot liquids.
  5. Pour the yolk mixture back to the pot with cream and milk and stir with a wooden spoon under medium heat. As the eggs cook, the custard will thicken in several minutes. It is thick enough if it coats the back of the wooden spoon. When it’s nice and shiny, remove from heat and pour into a serving cup. You can serve it hot or cold.


My sister-in-law took this picture of the trifle in glasses. All we had on hand for 12 people were wine glasses, so we made those work.


I think everyone needs a few easy snack-sized desserts in their repertoire. This recipe is my new favorite, and I'm almost positive it'll be yours as well. 

Salty and sweet is the perfect combination. Two mini pretzels sandwiching a peanut butter/brown sugar/powdered sugar mixture and dipped in chocolate. It's the ideal manifestation of salty and sweet, and you literally have to pry yourself away from them. It doesn't help that they are bite sized. Seriously, they are too good.

I first made these a week and a half ago and I've made them three times since then. I just made another batch tonight and doubled it, so I guess that's four. I've been in England for the past week where apparently it's not so easy to find pretzels. I had to search three different grocery stores for them. Another interesting thing I've observed in England--none of the chocolate seems to be sold in bulk. I've had to either buy chocolate bars to melt down or 100g bags of chocolate chips (about a cup).  I usually work from a Costco sized bag of chocolate chips, so 100g bags seem a bit absurd, but then again, I guess a 72oz bag is even more absurd.

Another great thing about this recipe is that it is incredibly easy. The sandwiches require zero baking and zero baking skill. My apologies to your summer diets, but you're welcome for all the people who will love you for bringing these to cookouts, potlucks, etc. I have no idea who to give credit to for this amazing recipe because it's all over the internet, but whoever came up with this was a genius.

Enjoy!

Chocolate Dipped Peanut Butter Pretzel Sandwiches
Makes 45-55

1 Cup Creamy Peanut Butter
2 Tablespoons Softened Butter (unsalted or salted) 
3/4 Cup Brown Sugar
3/4 Cup Powdered Sugar
1/2 Teaspoon Vanilla Extract
1 1/2 Cups Semisweet Chocolate (dark, milk, or bittersweet work as well!)
One Bag Salted Pretzels 

1. Beat the peanut butter and butter until smooth and creamy.
2. Add the brown sugar, powdered sugar and vanilla and beat until smooth.
3. Roll peanut butter mixture between your hands into tablespoon balls (approximately...or roughly the size of a cherry), and sandwich between two pretzels. Place all pb sandwiches on a plate in the freezer for roughly 20 minutes.
4. While pretzels are in the freezer, melt the chocolate chips in the microwave or a double boiler until smooth and melted.
5. Line a baking sheet with parchment paper.
6. Remove pretzels from the freezer, and dip half of each sandwich into the melted chocolate. Place on parchment. If you want to decorate them with mini chocolate chips do it right after dipping so that the chocolate hasn't had a chance to harden. Chocolate drizzle also looks nice over the dipped side.  Store in refrigerator until ready to serve. If you want to speed up the hardening process put the pretzels in the freezer for 15-20 minutes.


Of all the sandwiches, breakfast sandwiches are my favorite. There's something comforting about taking everything that's great about breakfast and putting it in between two pieces of buttered bread. It's also possible I find it comforting because I grew up eating breakfast sandwiches on Sunday after church. My mom is the queen of the fried egg sandwich. I guess I have her to thank for the fact that I find plain eggs and bacon boring and unsatisfying. At least these things are acceptable in North Carolina.

You can really do whatever you'd like with a breakfast sandwich. Be as creative or as simple as you'd like. Change up the choice of bread. Use ham instead of bacon. Spread cream cheese on the bread instead of adding a slice of regular cheese (I promise this is amazing). This seems like a pointless recipe to put up because it's so simple, but I've realized that a shockingly large number of people haven't been clued in on the sheer joy that comes from a good breakfast sandwich. So, I am posting two variations.

The variation I want to explain first is the Pimento Cheese, Egg and Bacon Breakfast sandwich. There are few, and I mean very few, things in the world that are better than a grilled pimento cheese sandwich. If you're not from the south, I'm sure this is a completely foreign concept to you and that's ok.

You may agree with me that the trick to a great, gooey grilled cheese sandwich is hand shredded cheese and adding a small layer of mayo to the inside of the bread.  Well, the same thing goes for using homemade pimento cheese in your egg sandwich. I combined this with soft scrambled eggs and bacon which results in a blending of flavors that is seriously out of this world. You start out with spreading the pimento cheese on the unbuttered side of a slice of bread, and once your eggs are done, you spread them over the pimento cheese, add a few slices of bacon on top and then sandwich it with the other piece of bread and grill it in the pan. Putting it back in the pan is essential, as it gives you the good buttery crunch and it also melts the ingredients together.

The second sandwich I've shown is much simpler, and it's my go to since sadly I do not always have homemade pimento cheese around. I sometimes leave out the bacon or the ham if I'm out of those ingredients. The pan I used was pretty bad, so the egg stuck too much to make it a perfect over medium fried egg, but my suggestion is to do it over easy if you're up for the mess or over medium. You can either use egg, mustard and cheese (with or without meat), or do egg and cream cheese (with or without bacon). I'm always rushing in the mornings, so if I have time to fry up a quick egg sandwich I promise you do too!

Enjoy!

Homemade Pimento Cheese*
Makes a full serving, feel free to cut this amount in half

2 10-ounce blocks Cracker Barrel Cheese, one Sharp White Cheddar, one Sharp Cheddar, grated
2 heaping tablespoons diced pimentos (not sliced!)
1 to 2 ounces cream cheese
1/2 cup Duke's Mayo
1 teaspoon cracked pepper
1/2 teaspoon salt
1/4 teaspoon garlic powder
1/4 teaspoon cayenne (optional)

Grate the sharp white cheddar and sharp yellow cheddar cheeses together in a bowl. Do not buy pre-grated cheese, as these cheeses come with a waxy coating on the outside and will not melt as well (or taste as good). Throw remaining ingredients into bowl, and blend gently with a spatula, forks, spoons, or whatever you have on hand. Keep refrigerated until ready to use. Leftover pimento cheese is delicious on crackers, veggies, burgers, sandwiches, pretzels, etc.

*Adjust amount of cream cheese and mayonnaise to suit your personal preference. If you prefer a creamier and tangier cheese use slighly less mayo and 2 ounces cream cheese.

Grilled Pimento Cheese, Bacon and Egg Sandwich
Makes 1 sandwich (double, triple, quadruple as needed)

2 pieces cooked bacon
2 large eggs
1 tablespoon milk
2 slices sourdough bread
1/8 cup pimento cheese
Salt and pepper for taste
Butter for the bread

Cook bacon in pan or in oven until crispy. Spread one side of each piece of bread lightly with softened butter. On the non-buttered side of one slide, spread a generous layer of pimento cheese, it should be about a 1/2-inch thick. Break bacon slices in half an set on top of pimento cheese. You can also crumble the bacon on top if you want to make sure to have it in every bite (or bacon lattice it if it's that kind of a day!).

In a nonstick skillet, melt a small amount of butter. Whisk eggs and milk with a fork until combined, then add a dash of salt and pepper. Pour into pan over medium-low heat. Stir with a heatproof spatula until small curds begin to form, increase heat to medium high. Begin to fold the eggs over themselves until they are still soft, but fully cooked and no liquid remains. This will happen VERY quickly, so make sure not to overcook. Remove eggs immediately and place on top of the pimento cheese and bacon slice of bread. The key is to start with a pan that is the right temperature and not take your eyes off of the eggs while cooking. This will give you a flavorful, soft scrambled egg.

Place the remaining slice of bread on top, butter side up, and add to the pan over medium heat. Slightly press down to make sure the ingredients come together without compressing them too much. Flip once sides are lightly brown. Cut in half and enjoy! Keep napkins nearby.

*Note: To make a fried egg sandwhich, everything is the same except for you spread a thin layer of mustard on the bread instead of pimento cheese. Then you can top with your choice of cheese, bacon or ham, and a fried egg. Throw in a pan and lightly brown on each side. This works well with the soft scrambled eggs, too, but I wouldn't recommend swapping fried for scrambled on the pimento cheese version.